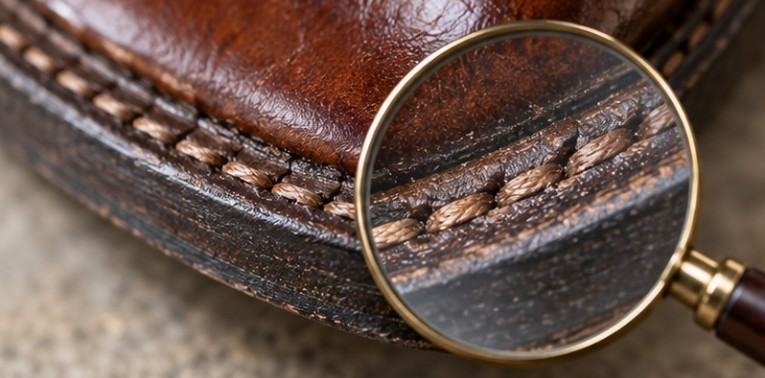
A worn outsole is often less worrying than a damaged welt. Soles are designed to wear out; the welt is part of the structure that makes many quality shoes repairable in the first place.
That distinction matters when buying secondhand dress shoes, boots, or loafers. Learning how to check welt condition on used shoes can tell you whether you are looking at a bargain that needs a routine resole or a pair hiding a much more complicated repair.
The inspection takes only a few minutes. The key is knowing where normal wear ends and structural deterioration begins.
Why the Welt Matters More Than Most Buyers Realize
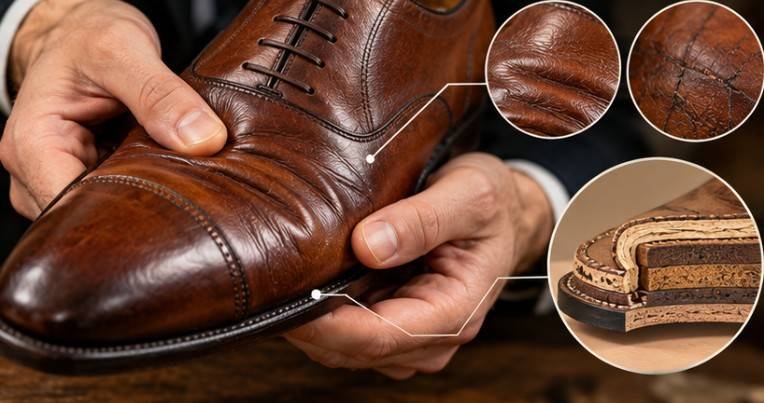
On welted footwear, the narrow strip running around the shoe is not simply decorative trim.
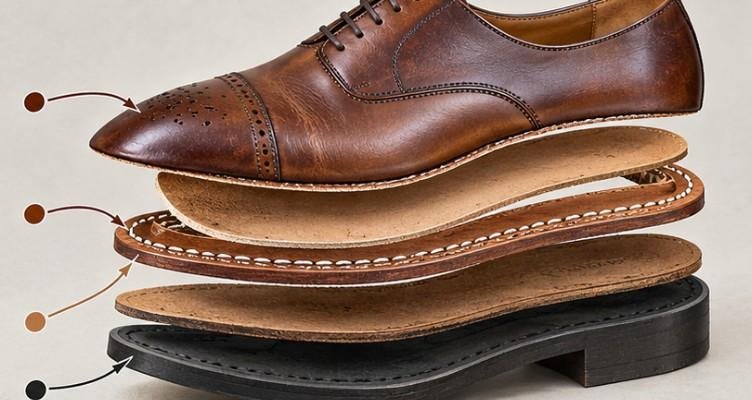
The Footwear Distributors and Retailers of America describes welt footwear as construction in which the welt connects around the tread area, while the upper and welt are sewn to the insole structure and the outsole is attached to the welt.
That arrangement is one reason Goodyear-welted shoes can often be resoled without rebuilding the entire shoe.
A scratched sole, worn heel, or faded edge dressing may therefore be relatively minor. A cracked, badly perforated, separating, or deteriorated welt deserves much more attention.
Start by Confirming That You Are Looking at a Functional Welt
Secondhand listings sometimes describe any visible edge stitching as “Goodyear welted.” That is not always accurate.
Decorative welts and molded imitation stitching can make cemented footwear look similar to traditionally constructed shoes. Conversely, some genuine welted shoes use finishing methods that make portions of the construction stitching difficult to see.
Look at the edge from several angles. A real welt normally appears as a distinct strip between the upper and outsole rather than stitching molded directly into a one-piece rubber edge.
Do not rely solely on whether stitches visible underneath line up perfectly with those on top. Closed-channel leather soles may conceal outsole stitching, and construction varies by manufacturer.
If the seller identifies the maker and model, verify the manufacturer’s construction specifications before deciding.
The Five-Minute Welt Inspection
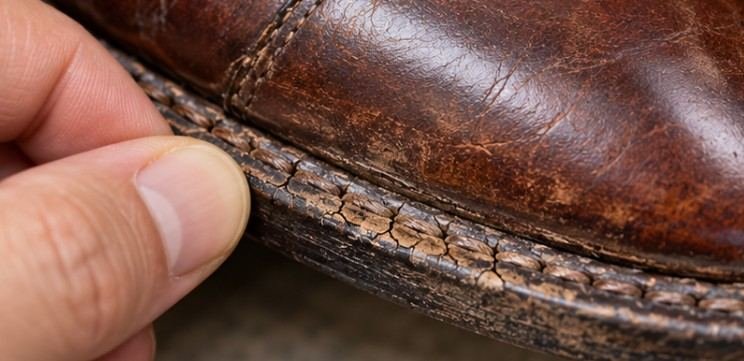
1. Follow Every Stitch Around the Shoe
Good lighting matters. Slowly inspect the welt from the toe around both sides and toward the heel.
You are looking for continuous, reasonably secure stitching. A little surface fuzz or discoloration does not automatically indicate failure.
More concerning signs include missing stitches, long sections of broken thread, torn stitch holes, or thread that has been completely ground away by pavement.
Pay particular attention around the forefoot and toe. These areas experience repeated flexing and abrasion.
One or two damaged stitches may be repairable. An entire section where the welt itself has been shredded is a different problem.
2. Examine the Leather Between the Stitch Holes
The thread is only useful if the material holding it remains sound.
Gently press the welt with your fingertip. Healthy leather can be firm, but it should not behave like dry cardboard or crumble around the stitch holes.
Look for deep transverse cracks, splitting layers, missing chunks, and stitch holes that have enlarged or merged into one another.
Research cataloged by the Smithsonian’s Museum Conservation Institute has found that changes in humidity can significantly affect the physical properties and degradation of tanned leather.
For a used shoe buyer, that means storage history can matter nearly as much as mileage. Shoes left repeatedly wet and then allowed to dry harshly may look lightly worn yet have brittle structural leather.
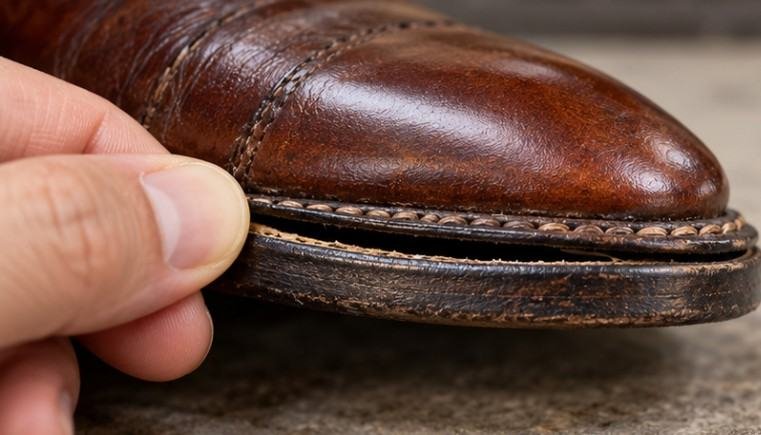
3. Check Where the Welt Meets the Sole
Hold the shoe normally rather than trying to pry it apart.
Use your thumb to apply light pressure along the junction between the welt and outsole. You are testing for obvious looseness, not attempting to separate the layers.
Tiny cosmetic gaps in edge finishing are not necessarily serious. A section that opens noticeably, shifts under light pressure, or appears to peel away deserves professional inspection.
Separation may involve failed adhesive, damaged outsole stitching, or deterioration deeper in the construction. You cannot reliably diagnose the exact cause from an online photograph.
4. See Whether Wear Has Reached the Stitching
Turn the shoe over. A leather outsole that has become thin is expected on a heavily worn pair. The important question is whether the owner kept wearing the shoe after the protective sole material disappeared.
If abrasion has erased the outsole stitch around significant sections of the perimeter or started grinding directly into the welt, what could have been a straightforward resole may become a larger reconstruction job.
Think of the welt as repair infrastructure. Once that infrastructure is damaged, replacing the consumable outsole becomes more complicated.
5. Compare the Left Shoe With the Right
Never inspect one shoe in isolation. Uneven wear can reveal problems that appear minor when viewing only one side. Compare welt thickness, cracking, separation, staining, and abrasion between the pair.
If one toe welt looks crisp while the other is severely ground down, the previous wearer may have had an aggressive gait pattern. That does not automatically rule out the shoes, but the more damaged side deserves closer scrutiny.
White Residue Does Not Automatically Mean Salt Damage
White material along an old welt often alarms buyers, but appearance alone can mislead.
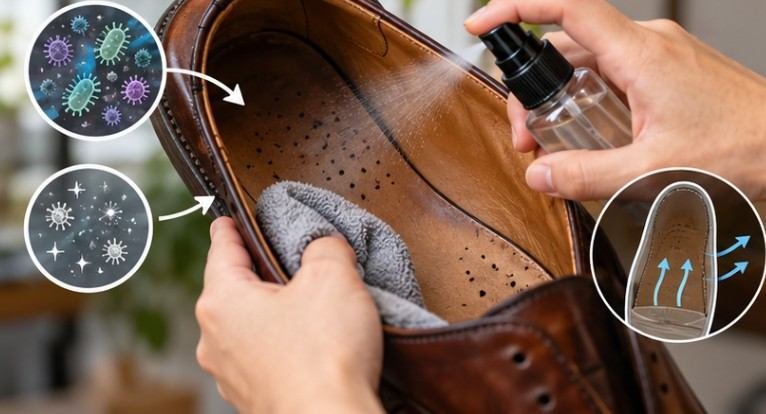
The National Park Service warns that aged leather can develop fatty-acid “spew,” a wax-like surface bloom that can be confused with mold. It also notes that repeated application of leather dressings can contribute to problems including darkening, embrittlement, and waxy deposits.
Mold is another possibility, particularly after damp storage. The Library of Congress notes that moisture and elevated humidity increase mold risk in stored materials.
Clemson University’s conservation work on historic leather shoes likewise documents past mold activity as a condition requiring treatment.
For marketplace purchases, persistent fuzzy growth, musty odor, extensive staining, or dampness should therefore carry more weight than a simple white line around an otherwise healthy welt.
Resole or Rewelt? Know the Difference Before Buying
A resole normally replaces the worn walking surface while preserving a serviceable welt.
Rewelting goes deeper. A cobbler must replace damaged welt material before rebuilding the sole assembly. That involves more labor and may expose additional problems once the shoe is taken apart.
This is why how to check welt condition on used shoes is really a question about repair economics. A $60 secondhand pair needing normal maintenance can be appealing. The same pair becomes less attractive if its structural edge must be rebuilt.
Professional conservators also recognize that dry leather can crack and become brittle under unfavorable conditions, reinforcing the value of inspecting the material itself rather than judging shoes purely by shine.
Do Not Let a Beautiful Upper Distract You
Secondhand listings naturally emphasize polished uppers because that is what photographs best.
Ignore the shine for a moment. Inspect the outsole edge, heel, welt stitches, toe, and areas where the leather layers meet.
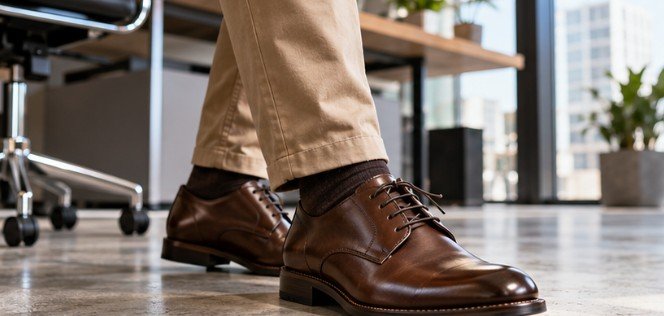
Once the construction passes inspection, style becomes the easier question. For workwear purchases, this guide to formal dress color combinations for the office can help place the shoes into a practical wardrobe.
The same structural inspection also applies to many welted slip-ons. If that is what you are shopping for, consider whether loafers can be worn with a suit only after determining that the pair is worth repairing.
FAQs
1. Can a damaged welt on used shoes be repaired?
Often, yes. A cobbler may repair localized stitching or replace the welt entirely, but extensive damage increases labor and may make inexpensive shoes uneconomical to restore.
2. Are broken welt stitches always a reason to reject shoes?
No. A few damaged outsole stitches can be repairable. Torn leather, enlarged stitch holes, severe separation, or crumbling welt material are more concerning than isolated thread damage.
3. How can I check welt condition when buying shoes online?
Request close-up photos of both shoes from the top, sides, toe, heel, outsole, and welt edge. Ask specifically about cracking, separation, mold, previous resoles, and repairs.
4. Does how to check welt condition on used shoes apply to every dress shoe?
No. Cemented and Blake-stitched footwear use different construction methods. First identify how the shoe was built before applying welt-specific inspection criteria.
Final Take
The smartest secondhand buyer does not ask whether a shoe looks new. I ask whether the parts designed to survive multiple soles are still healthy.
A scuffed upper can be polished. A tired heel can be replaced. Even an outsole nearing the end of its life may simply represent routine maintenance. But brittle welt leather, torn stitch holes, aggressive separation, or abrasion through the structural edge changes the calculation.
Spend five minutes following the welt before spending your money. In used footwear, the least glamorous strip of leather around the sole can reveal more about the shoe’s remaining life than the shine on top.